Abstract
The growing popularity of the use of social networks by businesses indicate a possible change in ETL requirements. Part of this change is that developers had to revise existing ETL model such that it caters for sourcing of data off the internet in addition to the traditional flat files or OLE/ODBC Connections. In this article, I will demonstrate extracting user tweets using Twitter’s REST API inside an HTTP Connection Manager.
Requirements
- Microsoft Visual Studio 2005 or later
- SQL Server 2005 or later
- Microsoft .NET Framework 3.5 or later
- Tweeter User Account that has posted at least 100 tweets
- An Active Internet Connection
Article
Let’s begin by launching Microsoft Visual Studio and creating a new Integration Services Project which is located under Business Intelligence Projects category. (If you are using SQL Server 2012 or later, you will have to launch SQL Server Data Tools – SSDT).
After you have assigned a project name, proceed to click and drag the Data Flow Task (DFT) into the Control Flow pane from the toolbox (SSIS Toolbox in SSDT). I decided to name my DFT as DFT – Retrieve Tweets
Add the following two connections:
- HTTP Connection Manager
- OLE DB Connection
I have configured my HTTP Connection as follows:
- Server URL = http://api.twitter.com/1/statuses/user_timeline.rss?screen_name=mafiswana&count=100
Note that you can replace the value of parameter screen_name with your Twitter user account instead of mafiswana.
I have configured my OLE DB Connection as follows:
- Server = Localhost
- Database Name = selectSifiso
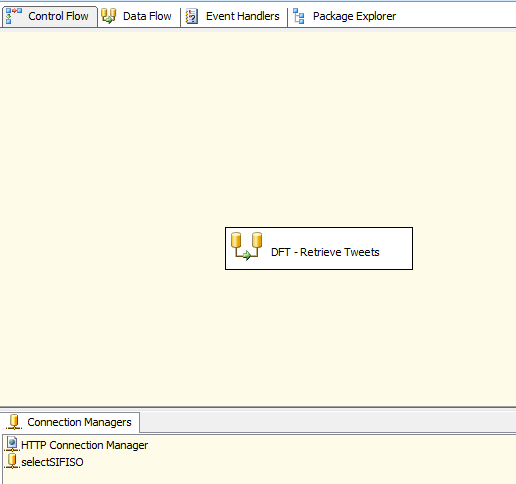
So far the package should look as below:

Let’s go back and edit the Data Flow Task.
Add a Script Component (SC) which is located under Data Flow Transformations.
Select Source as a script component type.
Edit the script SC and click on the Connection Managers tab on the left of the Script Transformation Editor. Under the Connection Manager column click to select the HTTP Connection Manager (it should be the only connection available).
Let’s move on to the Inputs and Outputs tab in the Script Transformation Editor. Here we will configure the source output columns.
Collapse the Output 0 node and click on Output Columns. Click Add Column and the following columns with properties configured as below:
- Name = sS_Tweets; DataType = string [DT_STR]; Length = 200
- Name = sS_TwitterDate; DataType = string [DT_STR]; Length = 200
Now let’s move on to the Script tab in the Script Transformation Editor.
In Object Explorer, right-click on References and Click Add. Under the .NET tab add the following references:
- System.ServiceModel
- System.ServiceModel.Web
If one or none of the above references are not available for selection, please ensure that you have .NET 3.5 Framework selected. You can do that by clicking on Properties – Application – Target Framework – .NET Framework 3.5
In addition to the already referenced namespaces, add the following namespaces:
- using System.Xml;
- using System.ServiceModel.Syndication;
Declare the following variables in the public class ScriptMain : UserComponent
- private SyndicationFeed sS_Tweets = null;
- private XmlReader sS_XmlReader = null;
Under the PreExecute() method, add the following:
- sS_XmlReader = XmlReader.Create(Connections.Connection.ConnectionString);
- sS_Tweets = SyndicationFeed.Load(sS_XmlReader);
Under the public override void CreateNewOutputRows() method, add the following:
if (sS_Tweets != null)
{
for each (var item in sS_Tweets.Items)
{
Output0Buffer.AddRow();
Output0Buffer.sS_Tweets= item.Title.Text;
Output0Buffer.sS_TwitterDate= item.PublishDate.ToString();
}
Output0Buffer.SetEndOfRowset();
}
The complete script code can be found here – tweets_ssis
Now that we have configured the Script Component as Source let us add an OLE DB Destination Component (ODD) and connect Script Component to the Destination Component.
I have configured the OLE DB connection manager of the ODD to use the selectSifiso connection. The data access mode is a Table or view – fast load. Under the Name of the table or the view, click New and create and output table. Click on the Mappings tab and ensure that the source-to-destination mappings are correct.
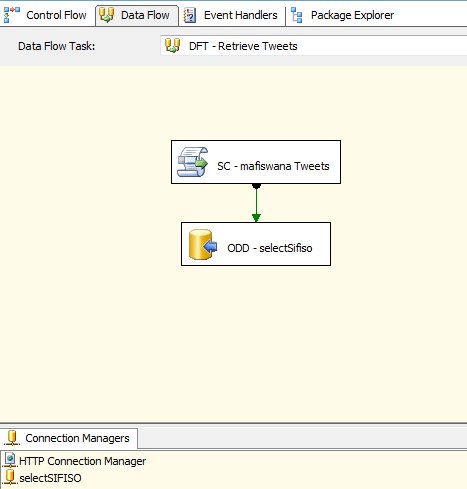
Your complete package data flow task should look as follows:

Conclusion
All left to do is to run the package and your tweets will be extracted and stored in SQL Server.
It’s that simple.
Till next time folks, cheers.
Sifiso
![]()


0 Comments